HOW TO INSTALL LIVEADMINS PLUGIN IN WORDPRESS

When You Already Have the Code
Step 1
First, log on to your WordPress dashboard. The address will look like this:
domain-name.com/wp-admin
Step 2
Download the “WG Live chat code integration” plugin from the given link. A .zip file will then download on to your computer.
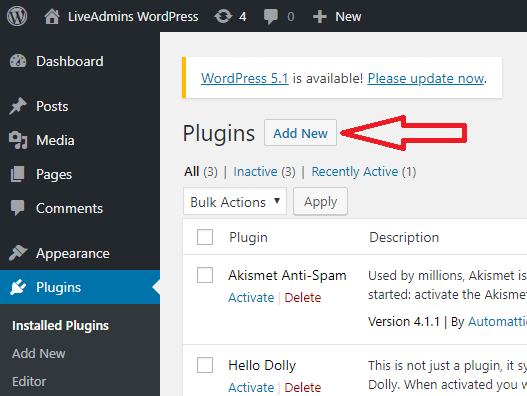
Step 3
Next, you will need to upload the “WG-live-chat-code-integration” file. Click on the “Plugins” option from the menu and locate the “Add New” option from the top of the page.
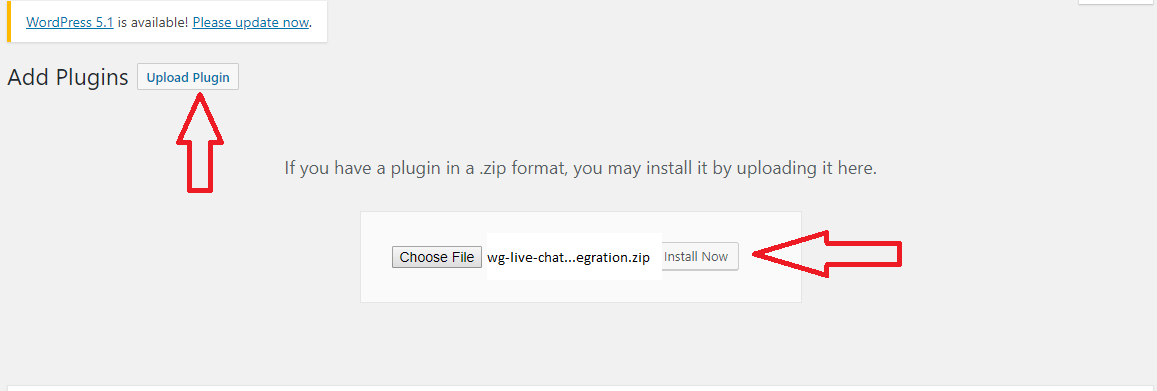
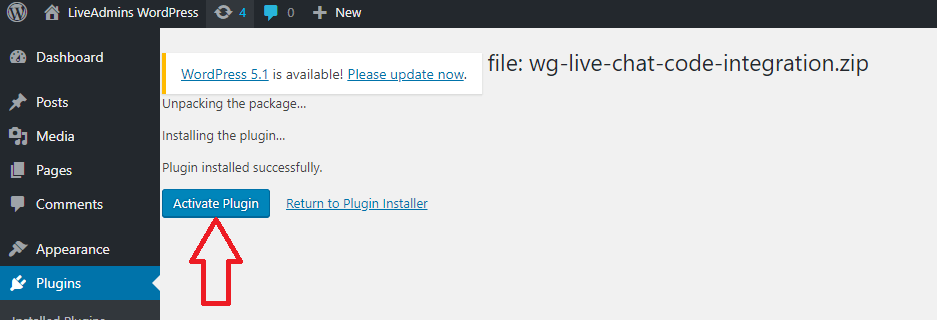
Step 4
Upload the “WG live chat code integration” .zip file from your computer, install and then activate it.
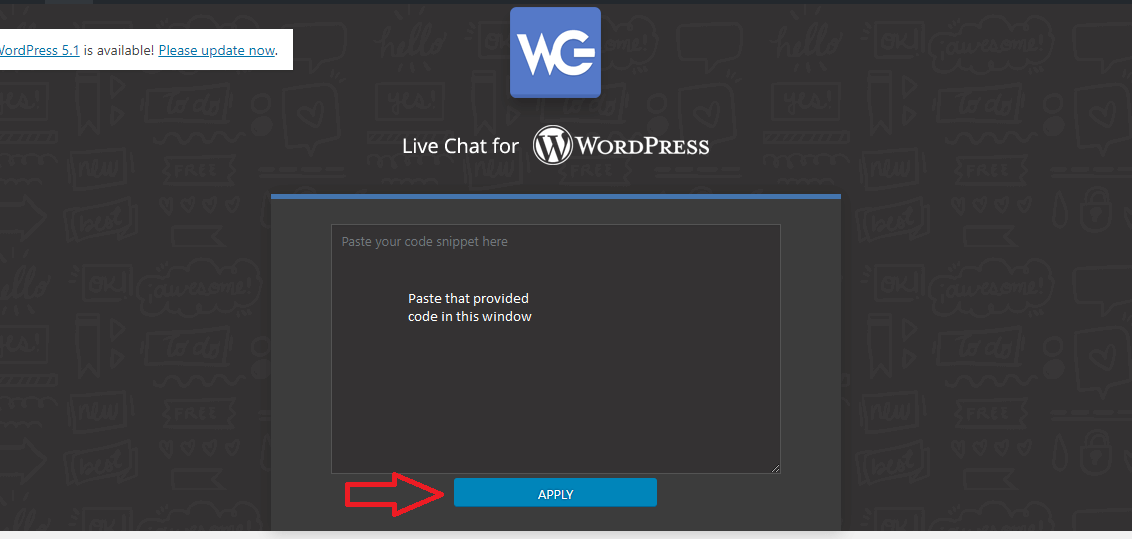
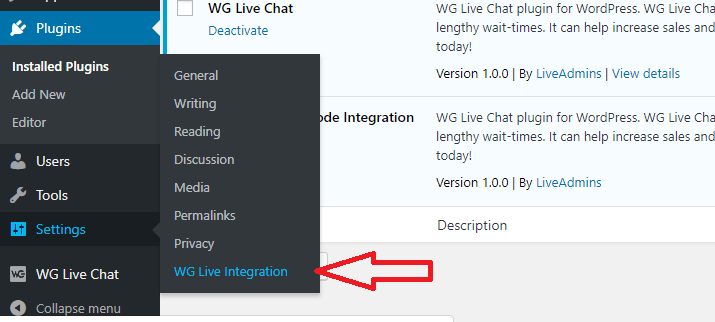
Step 5:
Hover over the “Settings” option from the menu and click on “WG Live Integration”. A new window will then appear.
Step 6:
Finally, paste the provided code in to the Plugin installation window and click on the “Apply” button. WG Live Chat is now ready to use on your website.