Google Tag Manager: Add LiveAdmins Live Chat to your website

Learn how to add LiveAdmins Live Chat on your site with Google Tag Manager (GTM) by following this guide.
Step 1
Open https://tagmanager.google.com/ and login with your company credentials. This will be with your IT department or a relevant authority.
Step 2
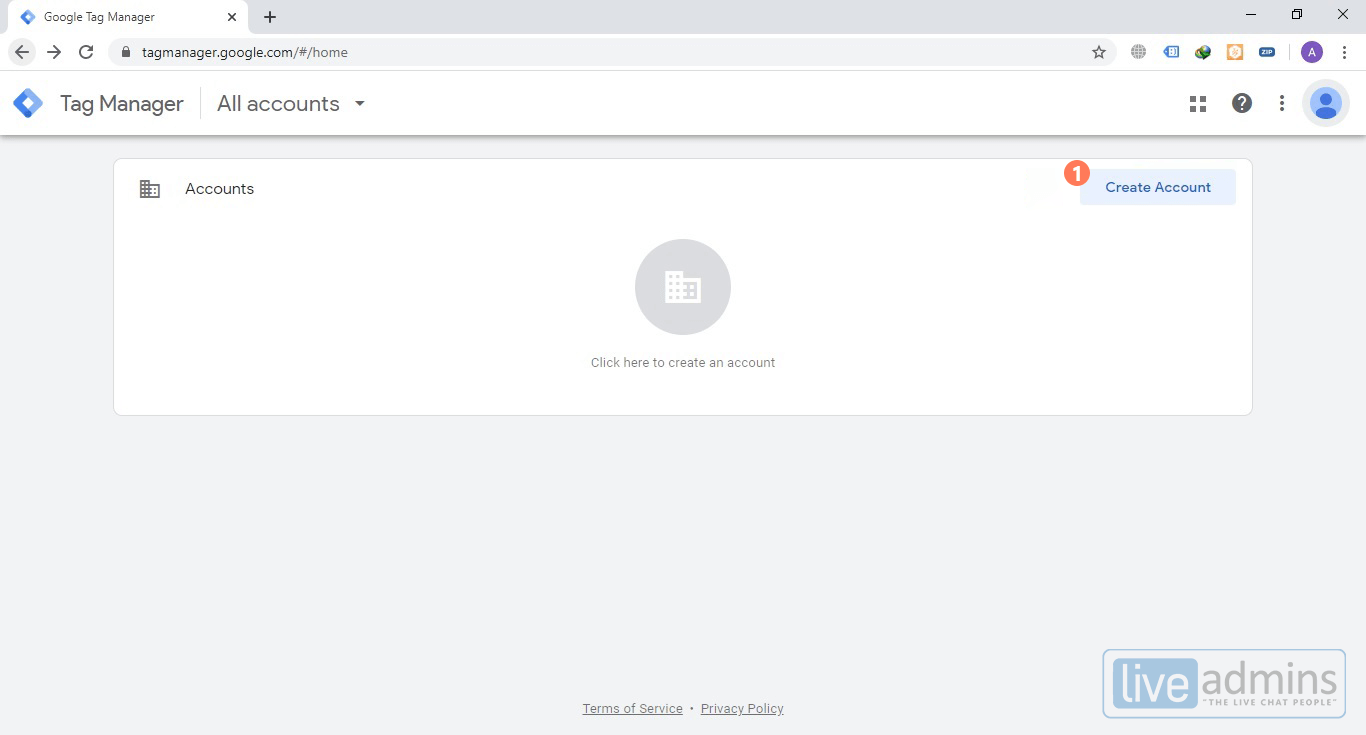
You’ll come to a page named “All Accounts”. On the top-right of the page, look for “Create Account”. Click on this. Shown as (1) in Figure 1.
Step 3
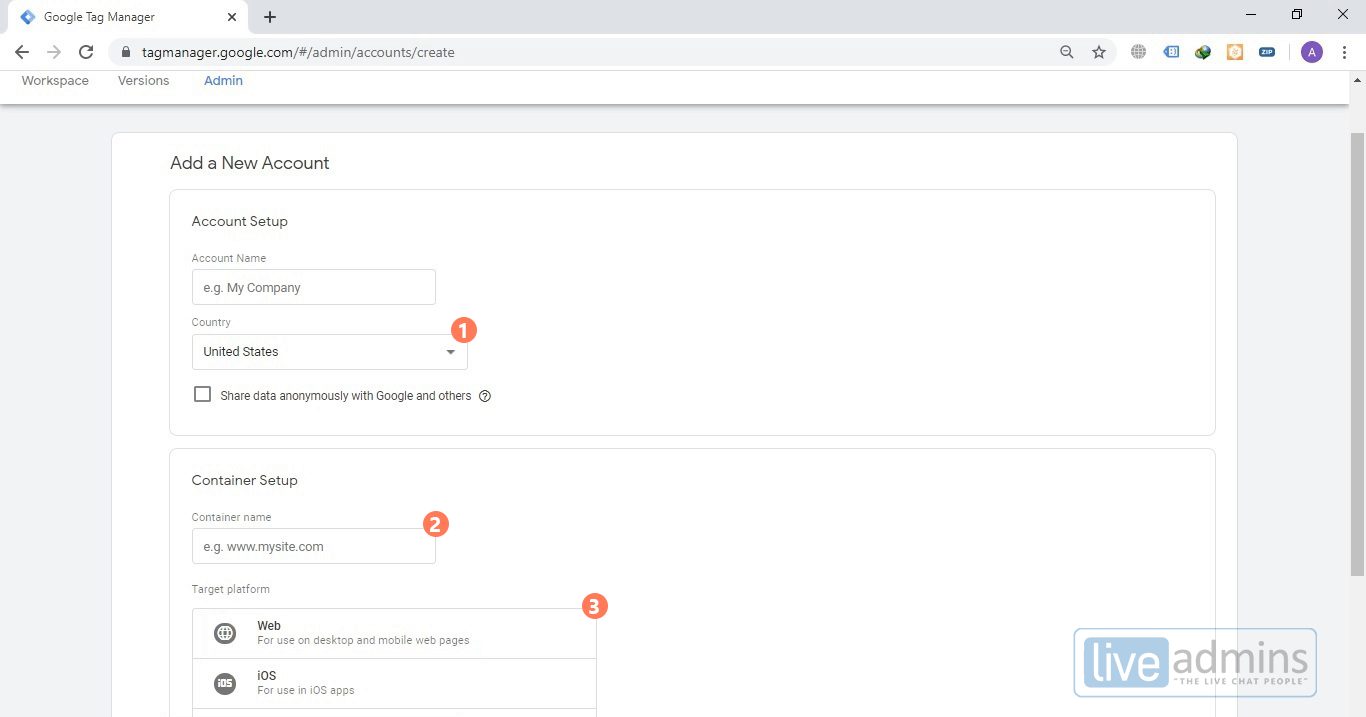
A new page will open up, fill the form as you see fit, i.e. Account Name would be the company name, Country is where your business is located, etc. Fill this as per your requirements. Shown as (1) and (2) in Figure 2.
Container name will be the website URL you’re looking to add, in “Target platform”, you have to choose “Web”. Shown as (3) in Figure 2.
When you do the above, you will then click on the “Create” button at the bottom.
Step 4
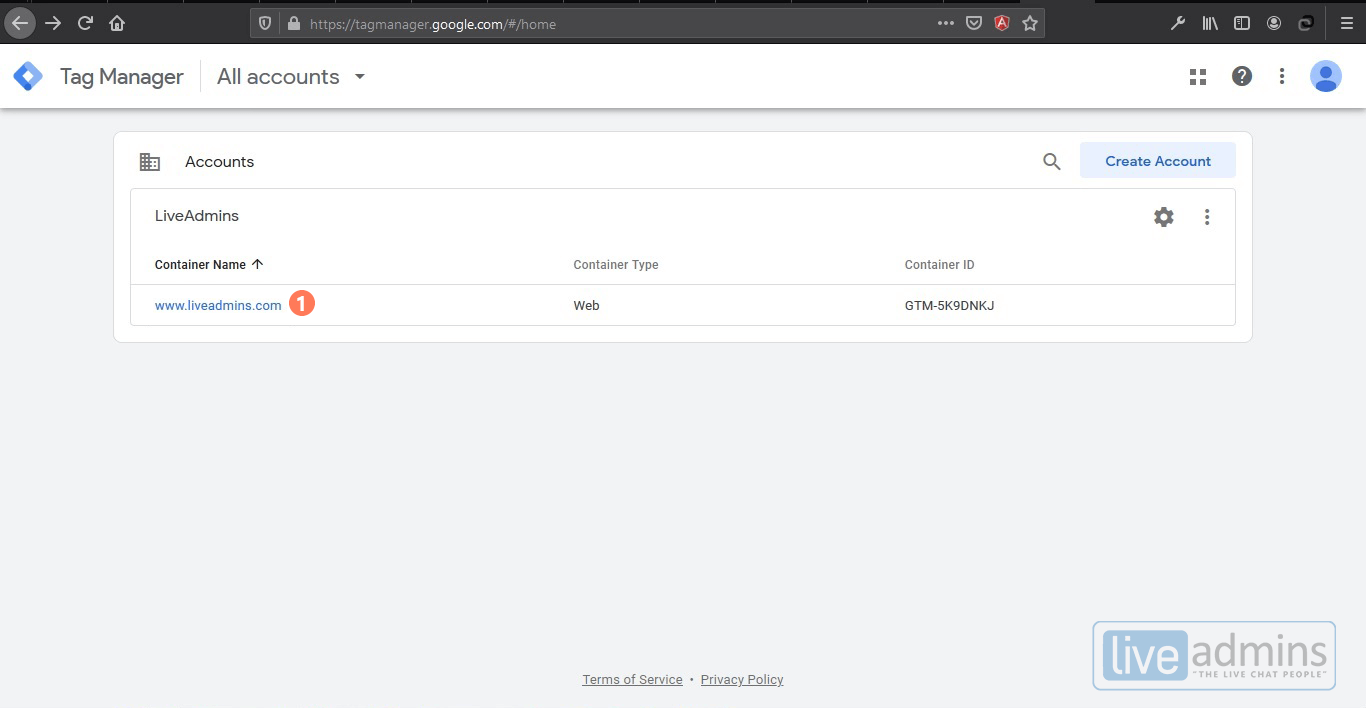
You will see a new entry in Container name, with the website added. Click on the Container Name: (www.liveadmins.com). Shown as (1) in Figure 3.
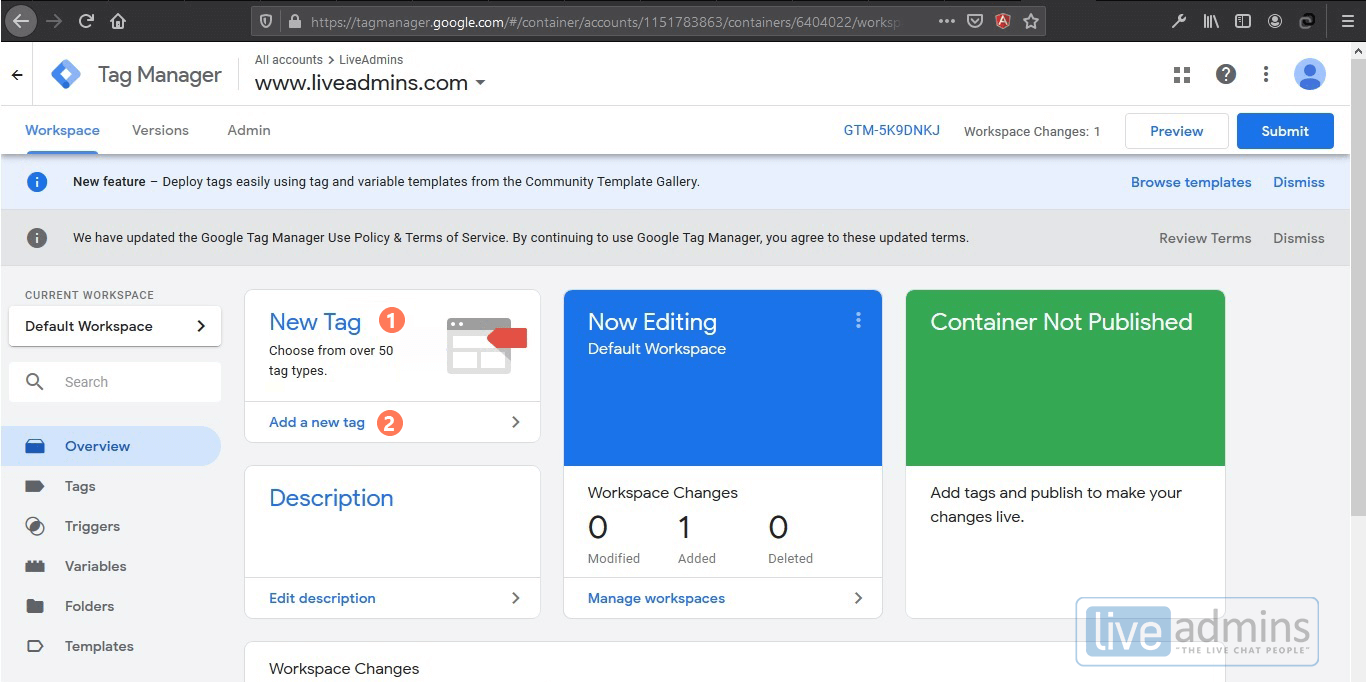
This will open up a dashboard, Look for the box that says “New Tag”, and click on “Add a New Tag” in the box. Shown as (1) and (2) in Figure 4.
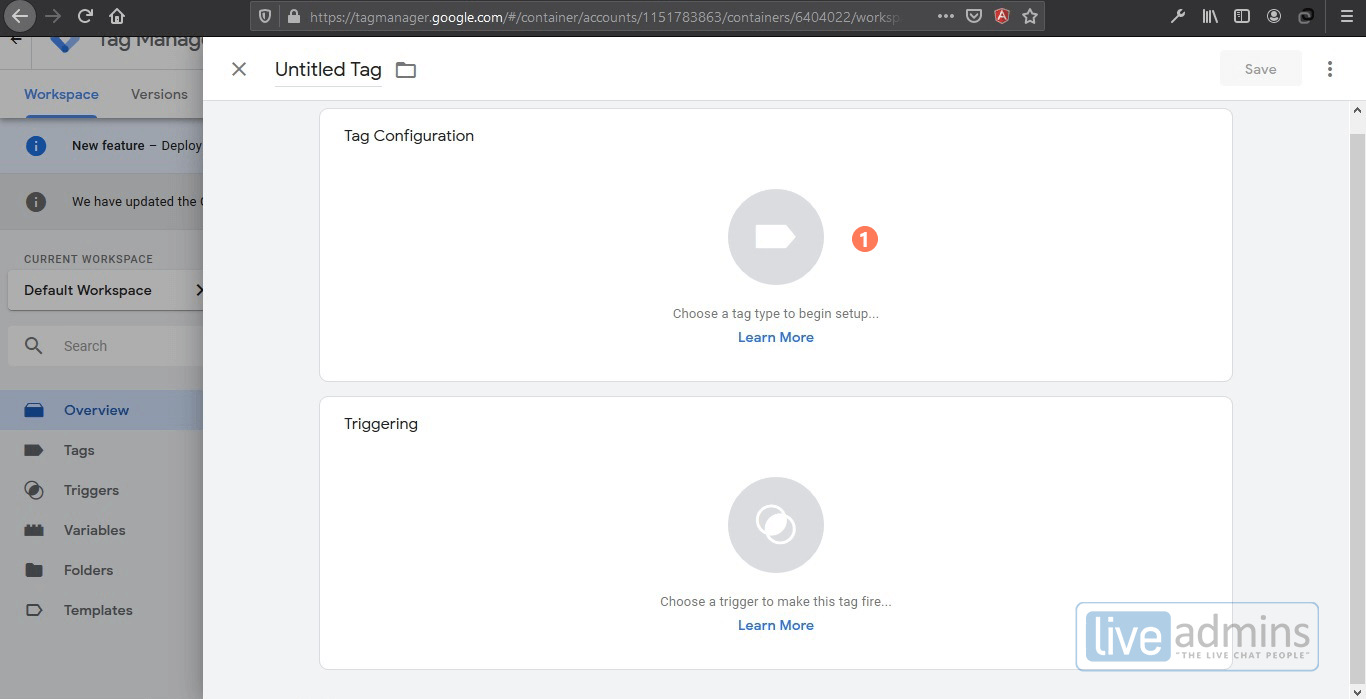
A new box will open up, click on “Tag Configuration” in the center circle. Your mouse cursor will change to a hand icon to denote this is being done right. Shown as (1) in Figure 5.
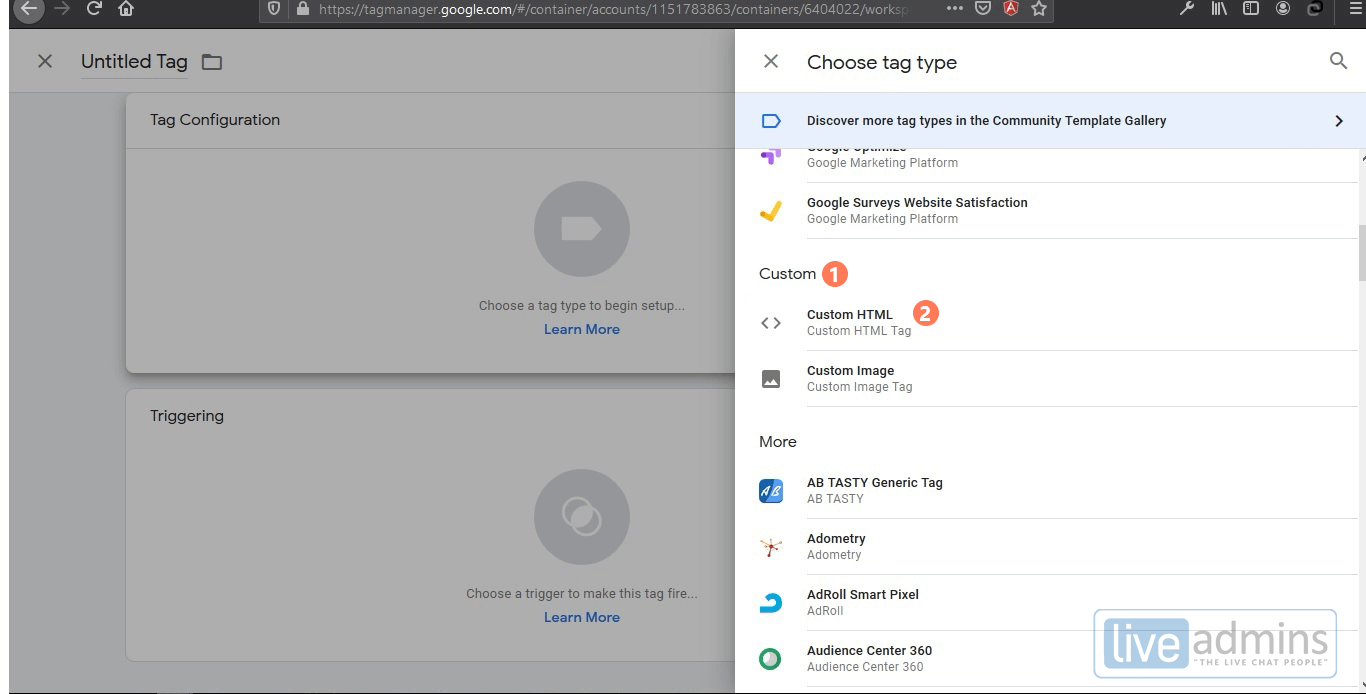
A slider will open to the right-side of the browser. You need to look for the “Custom” tag type, and click on “Custom HTML”. Shown as (1) and (2) in Figure 6.
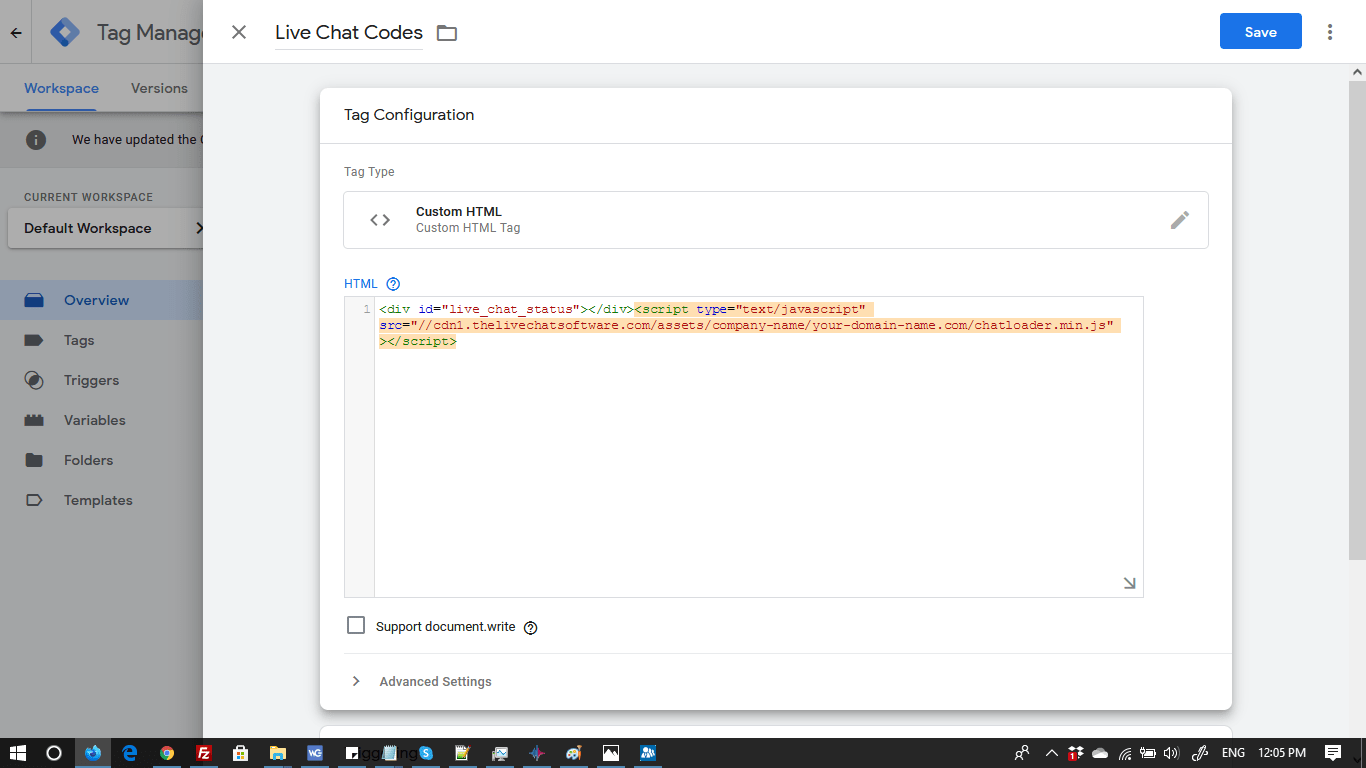
At the top of the page, you can name the tag at the place you see “Untitled Tag” e.g. Live Chat Codes. You will see a big text box titled HTML, in this box, paste the code we provide to you using copy/paste. Shown as (1) in Figure 7.
The “Save” button at the top-right can now be clicked, this means you entered the HTML code successfully. Shown as (2) in Figure 7.
Once you have saved the code, Google Tag Manager has now been added to your website.